For a student to thrive they need the parents and the teachers working in unison. The single best tool to do this is a shared calendar. 15 minutes of setup and I assure you the kids will turn in more of their work on time and the parents will be forever grateful for making it so simple to be an active part of their child’s education.
Most of my children have been using the google platform so these instructions will be centered around that. If you are on another platform just search/ask around for help setting up a “shared calendar.” The screens will be different, but the process will be very similar.
Google Calendar?
If you have not used the calendar feature offered by goole before I am not surprised. The current version hides it away a little bit. If you know where to find it, it is not much of a Waldo. Navigate to your email screen and click on the grid of squares in the upper right hand corner.
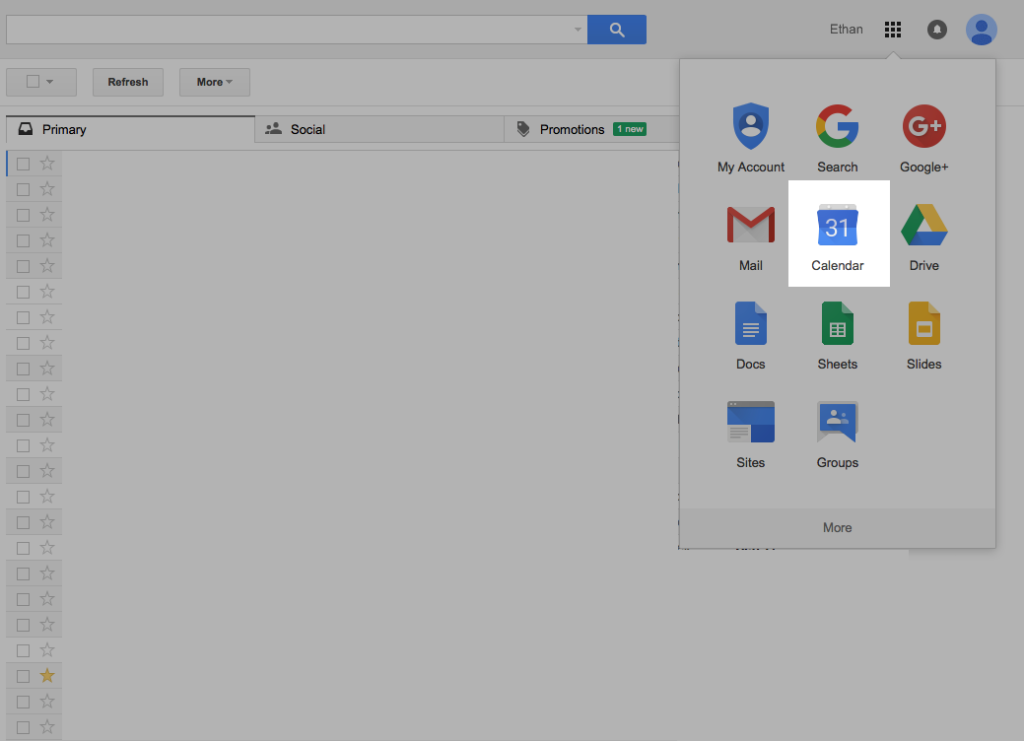
Click on the grid of squares in the upper right hand corner of google mail on the web and you can click on the calendar to access the calendar tool.
Once you are there you can create your first shared calendar. There is small button along the left hand column that will give you access to the first step in creating your calendar.
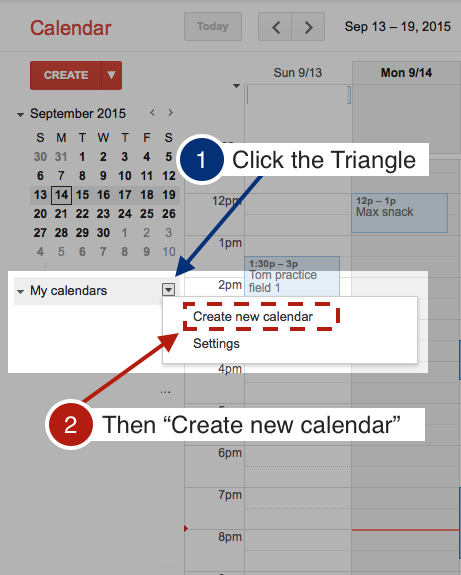
Step one of creating a shared google calendar
The next screen is where you will set up all of the attributes of the calendar.
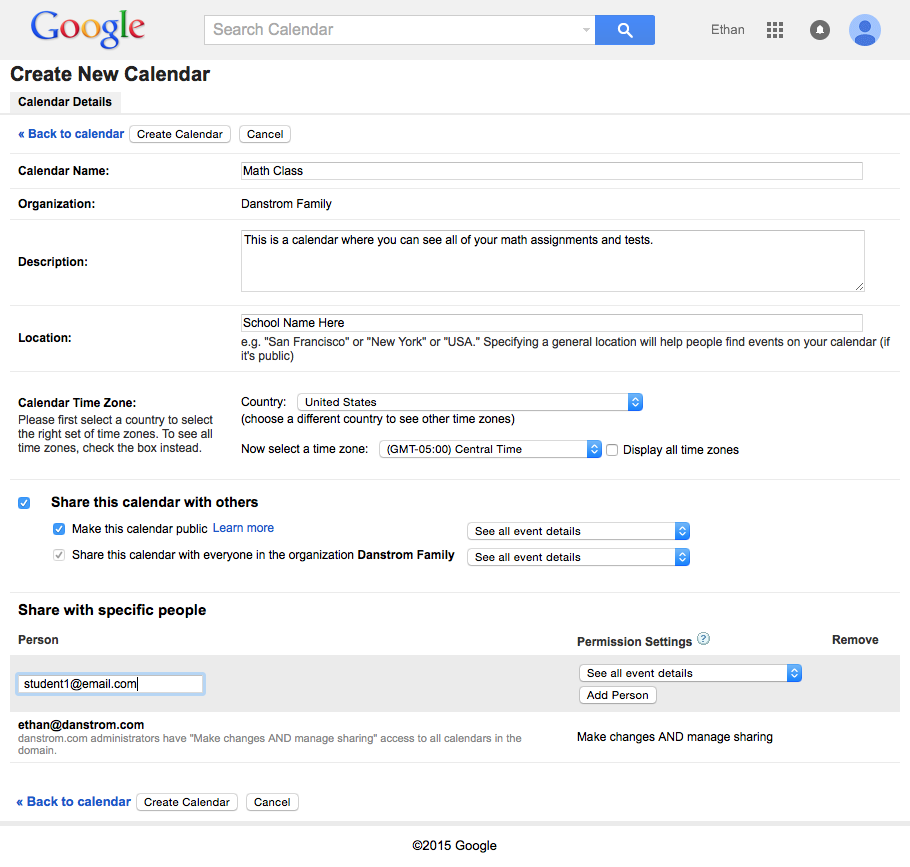
Attribute screen for creating a shared google calendar
Calendar Name: This is what will show up as the calendar name. People will be able to hide and show your calendar in whatever application they use (outlook, iCalendar, etc.). Name it something they can easily understand: “7th Grade Math” “Mrs. Smith’s 1st Grade” You do not need to add the word “calendar” They will be viewing this in their calendar and the extra word will get cut off.
Organization: This will likely show up as your school name. I use google apps for my family which is why you see my name in this screen shot.
Description: This is where you can talk about your class in general. It is also a good place to put your contact info so that parents will have it right at hand should they have a question about any events or assignments they see in your shared calendar.
Location: This is not super important, just put tour school name here.
Calendar Time Zone: This should be correct by default. Just make sure that it has the correct country and timezone.
Share this calendar with others: This box should be checked so that others are able to access the calendar information you are sharing with your class.
Make this calendar public: I would suggest that you make this public. Making it public allows parents to share the calendar with others. If you are concerned about it for any reason you can leave it unchecked and add each parent to the calendar manually.
Share your class events with ease!
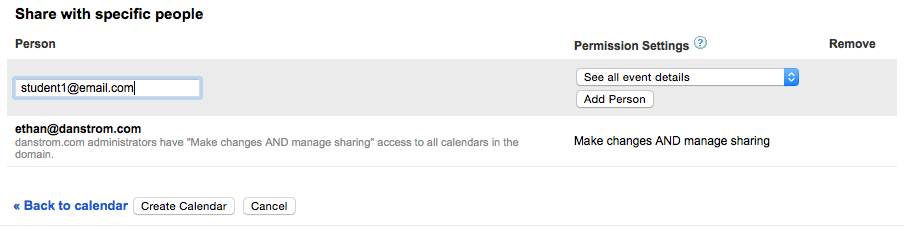
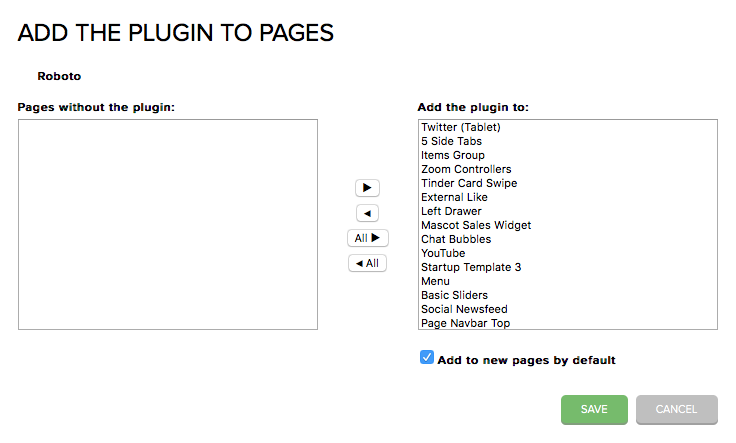
This is where you will add all of your parents/students to the calendar. They will all receive and email with a link that will add the calendar to whatever calendar application they prefer to use.
Person: add in the email address of the person you would like to add
Permission settings: Make sure this is set to see all event details. This will let them see the notes and attachments that you include in your calendar events. DO NOT select any of the other options. You do not want students or parents to be able to change events or add them. The default setting is what you should select here.
Add Person: Once you click “Add Person” they will be added to the list. You can quickly copy & paste each of the names from your current email list in here. If you paste in the entire list in the small box and hit “Add Person” it will automatically pick out each individual email. You can add your entire class in about 5 seconds.
Create Calendar: Click this once everything is filled in. You can always come back and change anything on this screen.
If you have made the calendar public there is a warning that it is really public. Click yes to proceed.
For students or parents that are not using google calendar you can send them a link that works for almost any calendar application.
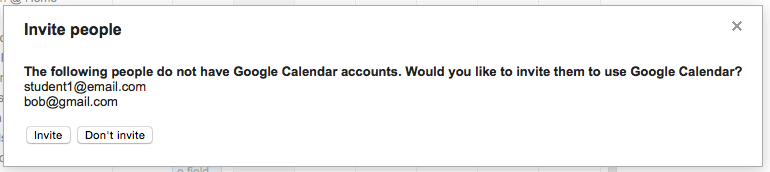
Add non gmail email accounts to google calendar
Click “Invite” and you are all done creating your shared calendar!
I will write up a quick page for creating a shared event next.
Happy teaching!